Methods and Miscellaneous Pt. 2


Ruby and JavaScript
In continuation with our theme, here are some more methods and tips that hopefully you will find helpful while on your software engineering student journey. As mine is quickly coming to an end I know that writing down this information is the best way to pass it on and help future students.
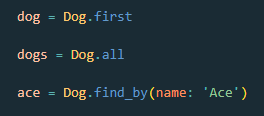
Remember that you can use many methods to access the data inside your databases, like so.

Object.assign()
Using Object.assign() with an empty object as the first argument is another way to assign new data non-destructively. The first object that you pass into Object.assign() is the same one that all the following objects that you pass to that method will be merged into along with its properties. However if two keys match on differing objects, the last object’s key will override the last assignment.
Naming event handlers
I’ve found that naming event handlers can be more than anticipated when first Learning React. Usually the project becomes a lot easier if you have set those up in a way that you can easily understand later.

Sticking to naming conventions have guided me throughout the program and I believe will continue to help me throughout my career. When it comes to naming props I try to define them with a prefix of 'on' like onToggleImage. For the follow-up function names I try to use the prefix 'handle' until the name sounds troublesome. Just like in vanilla JS the onToggleImage is the eventListener and handleToggleImage can work as it’s event handler. There are also many event handlers built into React, such as onClick and onSubmit which will fire on those types of events. Recall that if you need to return multiple JSX elements but don’t want them wrapped in a div then you should use React.Fragment tags, which also satisfy the 1 Top Level element rule.
Spread syntax

The spread operator will enable you to expand the elements in an array and can be maximized with the slice() method to make a new array portraying the data that you need without direct mutation of an array. You can also use the combination of these two methods to avoid mutating the original object when adding a new property to it. I have definitely learned more about how important it is to not cause mutations since first starting to learn React principles.
.includes
.includes is a method that will determine if a given array contains a specified value.
.forEach
forEach expects a callback function and the callback function that is being passed into forEach can also take arguments. The first argument of the callback function inside of .forEach is going to be the element. forEach will execute a function on each element in an array. It should be noted that the callback fn inside of forEach is a function definition, and you are invoking the forEach function.

useContext hook
One efficient way to use this hook is to create an exampleContext.js file and import createContext and useState from ‘react’ at the top. Here you will create the context and also export the variable representing that context to be passed throughout your app.

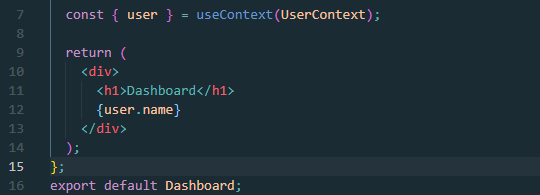
While using the useContext hook realize that there are two main parts that you are working with, the Context Provider and its value prop. The Context Provider is what you will wrap all of the components that need access to the context data with. You can accomplish this in the App.js file. Provider also has a prop called value which is whatever the actual value of your context is. Everything wrapped with the Provider tags will have access to the value of the Provider’s value prop, including their children, as basically a global state. Declare a useState variable object inside of your Provider function and give it some default state. Use the Provider’s value prop to pass down this context object. Import useContext and the context that you created at the top of the file where you want the information to be used. Then destructure the return value of useContext and write the state values you made previously with useState. Now use the information where you see fit within the div tags of that component’s return statement.

Lastly, The figaro gem is a great tool to use especially when you need to store some application secrets like API keys. As this information is sensitive you want to make sure that it does not end up where anyone can read it. By keeping that API key only available on the local repository we are able to do that. If you would like to use it to hide the API keys on you Rails backend Figaro will handle some steps for you. Figaro creates an config/application.yml file and also adds it to your .gitignore file. Use these practical methods/strategies to your advantage and make them commonplace. Have fun coding, practice your skills, and ask for help.